반응형
서버 보안을 위해 Google OTP를 설정하자
1. 설치
sudo apt update
sudo apt install libpam-google-authenticator -y
2. OTP 생성
google-authenticator
우분투 OTP 설치 시 나오는 Google OTP 옵션
실행하면 나오는 옵션:
Do you want authentication tokens to be time-based (y/n)?
→ y (시간 기반 OTP)
Secret key / QR코드 / Backup codes 제공됨
→ QR코드를 Google Authenticator 앱으로 스캔하세요.
Update ~/.google_authenticator (y/n)?
→ y (계정에 저장)
Disallow multiple uses of the same token?
→ y
Increase the OTP window?
→ n (기본값 권장)
Enable rate-limiting?
→ y (보안 강화)
3. SSH 접속 2단계 적용
-/etc/pam.d/sshd
@include common-auth 밑 추가

auth required pam_google_authenticator.so
-/etc/ssh/sshd_config
PasswordAuthentication yes
ChallengeResponseAuthentication yes
UsePAM yes
KbdInteractiveAuthentication yes
PermitRootLogin yes
4. SSH 재시작
sudo systemctl restart ssh
5.복구를 위한 백업
-우분투 Goole OTP 백업해주세요
~/.google_authenticator 파일을 백업하세요.

OTP 앱을 변경하거나 휴대폰을 초기화할 경우를 대비해 QR 코드/키를 안전한 곳에 보관하세요.
6. 확인

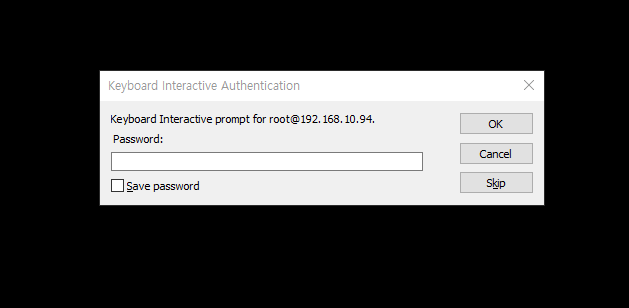
Ubuntu 우분투 OTP 설정 (Google OTP) 성공!.

반응형
'SW > 서버보안' 카테고리의 다른 글
| RAID 경고 에러 : Predictive Failure (0) | 2025.12.17 |
|---|---|
| Rocky 9.5 SSL 적용 (1) | 2025.08.01 |
| 웹페이지 PHP로 암호 걸기 (로그인 페이지 구현) (2) | 2025.07.27 |
| 웹페이지 사이트 비밀번호 설정 보안하기 apache 설정법 (0) | 2025.07.24 |
| 웹페이지 공격 방어용 연습용 홈페이지 만들기 귀찮아서 작성해두자 (0) | 2025.07.22 |


댓글